Inactivation Reasons
When you are making a client Inactive – you can give a reason why you are making this client inactive. It is best practice to have a list of common reasons that clients would be made inactive. This article shows you how to set them up, and also then assign them to a client when making them inactive
Having common defined reasons allows for better consistent data entry and reporting
Creating/Editing Reasons
From Setup > Client > Inactive Reasons

You will see a list of any already defined reasons that have been made in your system. To edit or remove these reasons, click on “…” on the row you wish to modify and choose Edit
You will only be able to remove existing reasons if no clients have been assigned to that reason. If you do not want new clients to use that Inactivation reason, un-select the **Active **field. This will keep the historical clients, but not allow any new clients to be added to that reason.
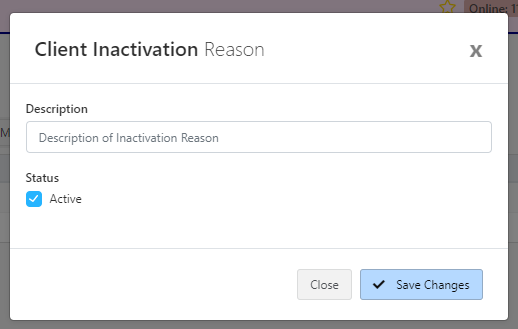
To add a new reason click Add New Inactivation Method (this will be the same screen if you edit an existing reason).
Give **Description **for the reason of being made Inactive. If the reason is to be allocated to clients click Active (un-ticking this box will not allow new clients to be allocated to this reason), and click Save Changes
Assigning a Client to an Inactive Reason
When a client is inactive – they will be excluded from any mail-outs, emails or data generated by Profiler for export. They may still appear in the reports (especially regarding historical financial reports)
Using the QuickEdit Tab
To assign a client as inactive and to the reason defined:
- first locate the client in Clients
- Click on Quick Edit on the left hand menu
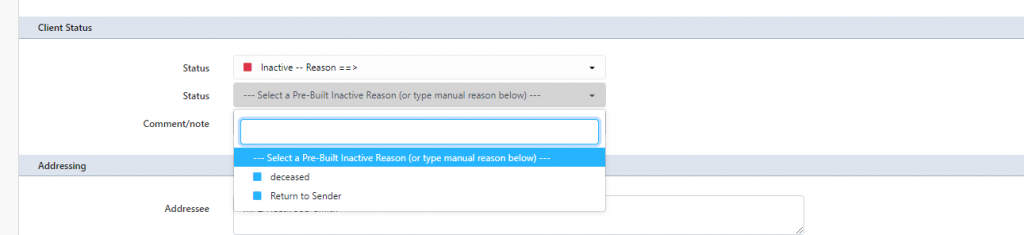
- In the **Client Status **section in the **Status **select Inactive
- A drop-down will appear where you can select the Reason as defined
- You can also add an extra note/comment if needed into the **Comment/Note **field
When you have finished scroll to the bottom and click Save Changes
Using Core Details Tab
To assign a client as inactive and to the reason defined:
- first locate the client in Clients
- Click on Core Details on the left hand menu
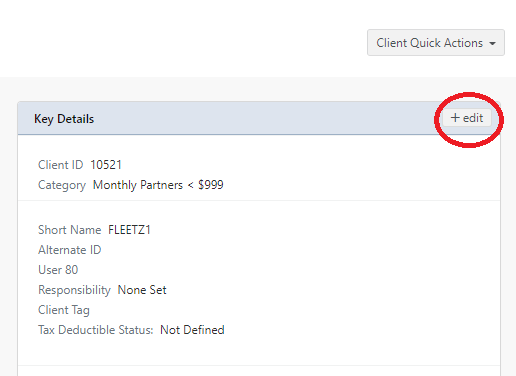
- In the **Key Details **section on the right hand-side click Edit
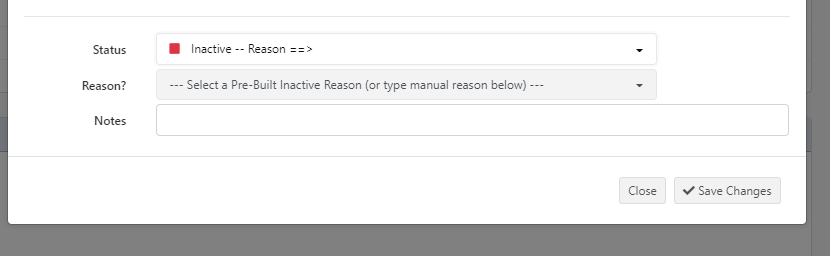
- In the bottom part of the pop-up window, in Status select Inactive
- A drop-down will appear where you can select the Reason as defined
- You can also add an extra note/comment if needed into the **Notes **field
- Click Save Changes